23/02/2010

Photoshop Work

I've been having trouble with design board work for my Friday portfolio modal. I've tried to smush together some of my sketchbook work with some of my glass. Started messing around with a sketch but the results weren't getting me anywhere and the whole thing was getting me down a bit so I decided to cute it up a bit and this is what I came up with....
Cheered me up a bit :)

Below is the portfolio/PowerPoint page I've been working on.
So far I think the images are strong but compared to some of the portfolios I've seen so far I just think its a little dull, and I haven't got any ideas of how to spruce it up. To be honest I think I would rather have a portfolio of images.

20/02/2010

Week 4 (Week Beginning 15/02/10) Continued....

Gel flex and Wax

After leaving the gel flex over night to cool I was able to take out the piece of plaster I had taken a mould from, the tip of the plaster had got stuck in the top of the mould bit I managed to get i tout with a small tool, I then used some araldite to glue it back together...looked as good as new.
There were some streaks in the gel flex and there was a gap where the tip of the plaster had caused some bubble but nothing that couldn't be altered after casting the wax in to the mould.
Before I started melting my wax I decided to do a displacement test to see how much glass I would need to make my piece out of glass, a friend let me borrow a billet of gaffer casting crystal because I want to do this with a billet so I can get used to casting with them so I can see the results with glass from the same company, and so I would know how much I would need to order if I wanted to use the billets. The way I did the displacement test was by pouring 1000ml of water into a measuring jug (I didn't expect I would need any more than that) then pouring the water into the gel flex mould until the water got to the top of the mould. The measurement on the jug was 600ml meaning that I would need 400ml to fill the mould (this includes the overflow) I then got a billet and put it in the 600ml of water to see how much I would need to get 400ml by getting the water level back up to 1000ml. The one billet got the water measurement up to 900ml, meaning that each billet is equal to 300ml, so I would need 1 and a third billets to fill the mould, so I will need to buy 2 billets.
Caring on to casting the wax into the mould, I chose to use a mixture of white wax and yellow wax so that after I've cast the wax it will still be able to carve out anything lumps but also if the studio gets too hot or if my hands are warm when I'm working with the wax the shape wont warp. The wax I was using was quite old and dirty so I would have to be careful when heating it because it might be dangerous for me to stir if it starts bubbling, and I dont want to get any of the dirt into my mould because it will ruin the surface. I melted the wax at around 65 degrees C and stirred it regulaly. Then when the wax had melted completely I left it a while to cool, not sure why I do this it's just something I've been told to do, so I do. When I poured the wax I did it very slowly and careflully to make sure I didn't get any dirt in the mould, when I was left with just the dirty wax at the bottom I poured it into a bowl with news paper in so I could throw it away and used some more newspaper to scrape up any bits left in the melting pot ready for the next person who uses it (because I'm nice, unlike some nasty people who leave dirty wax in the pot when they have finish, these people are bad people!). As the wax was cooling I used a spoon to break the skin on the wax and scoop some wax out to hollow the mould out a little to save some time when steaming the wax out of the mould, and get the wax to cool quicker.
When the wax had cooled I used some wax caring tools to clean out all the lumps and bumps until I was happy that it was good enough. After l cleaned the wax up I put the piece next the plaster piece to compair, the wax seems to have shrunk from the gel flex mould so I will have to do another displacement test when I have the wax cast in a mould. If I'm lucky I could save some money and I may only need 1 billet.

Desk Watch (19/02/10)

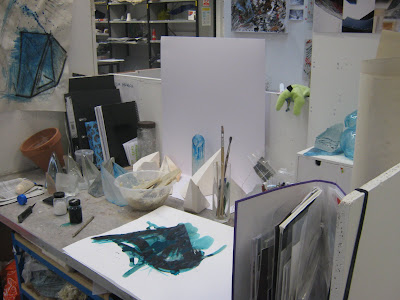
Again back on the painting, nothing amazing, might just cut it up and use it in a colleague. I have some more piece of plaster and glass scattered around that I have been working on. Stuck up a few images I took at the British glass biennale in 2008, but no other exciting images. Still need to stick some up.

18/02/2010

Week 4 (Week Beginning 15/02/10) Continued

Kiln Casting

At the start of week 3 I made a mould to make Sven a twin brother, but not an identical one. When I made the mould I made some space of excess glass by sitting the piece on some rolled out clay and cut around the edges to continue the shape and because the last one I did, I had to spend some time flat bedding the piece so it could be could on the glass band saw. This way I would have to do as much cold working and if I needed some glass cut off I could get it done faster. I used the same mould mix of Plaster, Silica, HT and water but I ended up having to get some more mould mixture after I had poured because I had made the walls around the mould slightly wider than I did the last time. When the mould had dried long enough so I could take away the walls I cleaned up the mould and removed the wax and clay using some tools. When I was happy the mould was clean enough I put the mould in the drying cuboard and left it there until Friday. I wanted to see if I could get more of the copper colour in the glass (without buying the Light Copper Oxide colour of the Gaffer Casting Crystal, which I am considering getting for my final piece of work) so instead of just sieving the copper oxide in I just tipped a load in (I know very technical) then brushed it around the mould to cover all the surfaces, I wanted to put some into the flowerpot reservoir I was using but I've done this before and it makes an orb of colour in the middle of the piece (not really what I wanted). Instead of doing a displacement test I took Sven and weighed him on some scales, he was about 680g. Then I weighed out 680g of glass but it didn't look like very much compared to the size of Sven, so I put and extra 100g in because I thought about hown I had needed to cold work the piece so I'd taken some weight off (not 100g but its better to have more than you need compared to not enough). When I had set every thing up, put the glass in to the flower pot and set up some pieces of kiln shelf to rest it on and put it in the kiln to cast over the weekend. But unfortunately someone must have opened it and forgot to turn it back on or I was a bit of a plum and forgot to turn it on - but I am very sure I turned it on. Anyway when I came in on Monday morning to see how the cast was going I discovered my glass set up just as I had left it (cold and un melted). So I locked the kiln and turned it on checking it repeatedly to check no one was trying to mess with my head....

Here is the kiln program I used:

100 ⁰C/hr → 550 ⁰C → Pass hrs
Full ⁰C/hr → 880 ⁰C → 11.00 hrs
(held longer to try to get rid of bubbles)
Full ⁰C/hr → 520 ⁰C → 15.00hrs
10 ⁰C/hr → 300 ⁰C → Pass
20 ⁰C/hr → 100 ⁰C → Pass
End

And here is how the piece looked when int came out the kiln:

After looking at this piece I'm starting to lean towards using coloured casting billets to get a consistent colouring throughout the piece, but I could still use copper oxide with the billets to add a bit more colour and detail to the pieces. Not sure yet though, especially as I have moved on to make my forms with a mixture of surface textures.


Gelflex Mould

In my last post I had started to develop a plaster modal with a mixture of curvy flowing surface to contrast the geometric form. I have decided that I want to see how this will look in glass so I flatted off the straight edges but hand laping the plaster against a sheet of sand blasted sheet glass and used sand paper to smooth out the curvy surface ready to make a gelflex mould of it.
When setting up my piece of plaster I sat my piece of plaster on a rolled out sheet of clay and cut around it to leave me with a bit of over flow when pouring wax after the gelflex is made and it will provide the overflow for my investment moulds. When I was waiting for the gelflex to melt I used a spray bottle to keep the plaster damp so the plaster doesn't stick to the gelflex.
The gelflex I used for this mould was my old one I had for making brothers for Sven, and after that had been melted it didn't look like i would have enough so I managed to find out an old gelflex that I had forgotten about to cut in to tiny chunks to put into the melting pot. I started heating the gelflex at 150⁰C but it was taking a long time for the gelflex to start melting even with the lid on so I turned it up to 165⁰C that seemed to work a lot better. It took around 2hrs to melt completely. When the gelfex had melted I turned off the pot and left it for just over 30mins and stirred it regularly. I think I may have poured it a little too soon there were a few bubbles rising to the surface, especially near where the point at the top of the plaster is. I usually leave gelflex to cool for around 45mins but in some of my moulds haven't picked up all the detail and there have been streaks in the gelflex, this is why I poured it earlier.
Didn't seem like too bad a mould but I'll have to wait until the mould has cooled completely so I can take the plaster out and have a look, and then I can go on to make a wax from it and see how my new form will look in glass. This wont be my final piece, it's just a test to see how the contrasting surfaces work together. I really want to see how the curves look when looking through the glass on the other side of the piece.
Also really proud because Mark our plaster technician (and a legend) commented on how beautiful the piece was *Happy Kimi*


Random Photo

Can't remember taking this photo, but I really like it...

"Hello Feet"


16/02/2010

Week 4 (Week Beginning 15/02/10)

Plaster Models

(In Week 3) After attempting to re make my shape using my rubbish gelflex mould I have chosen to make some new shapes using the band saw to cut up some chunks of plaster, like I did originally to make the shape I've been working with a lot. Going to keep with a similar shape as I'm quite fond of triangles at the moment, so at the end of last week I made a couple of plaster triangle shapes to cut more 30cm and I needed it to be 13cm deep (I tried 2 times the size but that seemed like it would be a bit too big and After attempting to remake my plaster shape by using my rubbish gelflex mould I have chosen triangles shapes out of, I tried to make them by measuring a right angle triangle that was 1.5 times as big as the original shape making it 19cm x 23cm, the hypotenuse difficult to cut on the band saw, also if I was to make it out of glass it would be too expensive just for testing). As I am not used to working with just plaster (when working with plaster, silica and HT the amount of water is measured in liter, and just working with plaster the water is measured in pint) I estimated at I would need 4 pints of water and about 2.75kg of plaster after I set up my mould and I mixed and poured in the plaster the mould collapsed, I managed to pull it back together with a little help but it there wasn't enough plaster to get up the 13cm in depth, so I tried again with the same amounts of plaster unfortunately as the last mould had spilt I didn't find out if there was enough plaster to get to the 13cm point on the inside of my mould. But fortunately this time there were no spillages.

(Now in Week 4) I have started working on cutting out some new triangular shapes and working on some organic flowing surface decoration/texture. To make the texture on the piece below I just stared carving into the plaster with ceramics and wax carving tools to give a nice organic flowing type of efect. My original idea was to make gelflex of an interesting piece of wood then amke a wax of it, pour plaster over the top to make a block to cut out on the band saw then to melt the wax out to give the imprint of the wood. I may still do this but I really like the texture I have created.


09/02/2010

Week 3 (Week Beginning 08/02/10)

Plaster Models

On the left is an image of the gleflex mould I made last semester of a plaster form I had cut and smoother out. At the end of week 2 I made a wax for lost wax casting from this mould and saw that it was staring to look a bit shabby and I realised I should have cast the gelflex into a triangular shape the fit the shape of the plaster model. As I ended up flat bedding off a lot more than I would have liked to on my kiln cast glass piece of the same shape I wanted to try to re make the mould, so I decided to pour plaster into the mould, now looking back on this I don't think I was such a good Idea because as I have been trying to smooth down the edges and it had taken a lot of time and effort, and I'm still not happy that the edges arn't completly flat. And as I have been polishing down the sides the shape has been getting smaller and I dont think that it looks as good as the original. I have been thinking about trying to make the piece again using different methods, like re cutting the piece on the band saw by measuring out the shape with a little etra to the size to alow for polishing or another idea I've had is to use alginate to take a mould of the glass piece as I'm happy with the shape and flatness of it then use the alginated to make a new plaster model.

Desk Watch (08/02/10)

My desk is looking a lot fuller today, just wanted to share that with everyone.
As you can see I have spent some time doing some drawing and painting (not great one though) and I'm soaking some plaster ready to cut up a new shape on the band saw in the week.

Desk Watch (05/02/10)

Desk at the end of week 2. Still looking a bid naked dispite the new glass editions, could do with some images stuck up of my inspiration. This will be my aim for the end of week 3


Also in the week I made a second investment mould for my arcitectual form, and have booked a kiln for the 11th and over the week end, I'm hoping I'll be able to use the same kiln as last time because I was really happy with the results, may hold the top temperature for an hour or so longer to get rid of those last few bubble, not sure weather to use the copper oxide again although I have been getting a lot of positive feed back off fellow students and staff about the ascetics of the piece. I have worked on making another wax for lost wax casting but as I'm not very happy with how the gelfex turned out last time, I'm planning to make a new gelflex mould and reinforcing it with plaster to make it stronger and so it holds its shape better. I've also made a a copy of the arcitectual shape after the original has been chipped and worn down while I was using it in hot casting and I have put the off cut glass from my kiln cast in a kiln with some copper oxide sprinkled under it, thought it might be a idea to use it to make some related pieces of jewelry.

08/02/2010

Week 2 (Week Beginning 01/02/10) Continued

Kiln Casting

This week I was able to take the glass I had casted the Friday before out of the kiln. When I first looked into the kiln I was very impressed with my cast, there were very few bubbles, it was very clear and I couldn't see any signs of devitrification on the surface.
All the glass had flowed through the flower pot and there was a little too much, fortunately I had made the mould to accommodate for a little extra glass.
When I took the flower pot a
nd the kiln shelves it was resting on off the mould you could see where the kiln shelf had been and that the way the glass had flowed out the mould had pushed the copper oxide out to the corners of the mould, before I put the mould in to the kiln I sievedd the copper oxide power all over the mould to get the blue copper colour all around the piece.
When I got the glass out of the mould I really liked the way the copper oxide looked like it was bleeding into the center of the glass like routes or veinesss. This has inspired the idea of combining my arcitectualll forms with organic forms and textures like glass artists Colin Ried and Sue Nixon.
and model making.

There were some lumps on the surface and they weren't all completely flat as the shape had warped when it had the gel flex mould taken of it, I may make a plaster mould next time I work with these angular shapes so I don't lose too much of the surface colour or detail. But before I could start polishing I needed to remove the overflow from the glass, my original idea was to put the piece in plaster and put the it in to the lap saw but I was worried that the corner with acute angles would chip or break off. I asked around a few people for their opinion, the solution I settled for was to flatten of one of the edges so the bottom of the piece, it needed to be flat and at a 90 so that it could be pushed through the glass band saw.
The glass wasn't
completely flat after it was cut so I flat bedded where it had been cut off and the other two largest surfaces because they weren't very flat either and there were a few lumps on there too. The glass was flat bedded on a 120grit bed, then polished down the edges on the linisher so that they wouldn't be so weak or chip too. I left the smaller surfaces because I wanted to keep some of the cast surface and colour, when I flat bedded the piece I ground away a lot of colour trying to get the piece flat.
Below is an image of the piece after it was flat bedded, I left it a bit wet when I took the photo to show the colours in it and how it would look when I start to polish it some more. I need to get more practice polishing ready for when I make my piece to display at the degree show and new designers.
I am not sure what to make of this piece, I like to think of my work as art pieces but there seems to be a need for my work to also have a function rather than, just be a piece of art work, I have considered thinking of it as being a piece of lighting but I'm not sure that this is what I want for my work. I have also thought about using the shape rather than just using it in glass sculpture and thinking of how it could work in another context. I have thought about designing contemporary bathroom fitting material fitting, for example I think this would make if the shape was adjusted sligtly and hollowed out the shape would make a very modern and interesting shaped sink or bath. I have also thought about using my hot cast pieces for lighting or as small windows, I think the the hot casting process would be more fitted to working with product design because it is easier to make multiples and there isn't as much polishing needed as there is in kiln casting.


For now I have named the piece Sven, as it is my baby so it should be named not sure why but me and Miss Clark came to the conclusion that is looked Swedish. Until next time, it good bye from me and it's good bye Sven (It's late and I'm sleepy)

Week 2 (Week Beginning 01/02/10)

Hot Casting

On the Monday of this week I got an induction into hot casting. I decided to use some of the shapes I had already cut out of plaster and smoothed off, unfortunately one of the shapes was slightly undercut so it was hard to get the shape pressed
into the sand so I ended up using just a bit of shape to press into the sand. So if I decide to do any more sand casting (which I probably will) I need to remember that there shouldn't be any under cuts and also the finish is important too, Simon suggested using car lacquer so the plaster is smoother and wont absorb the water in the sand and will leave a neater imprint.
In the image above on the right are the things I used for hot casting, had to put a handle on one of the pieces of plaster so I could push it in and pull it out easily, the handle was just a piece of wood glued on with araldite.I used gloves when sieving the sand so if there were any bits of glass in the sand I would cut myself on them, the trowel i used to flatten the edges of the sand where I had pushed in my plaster models, the largest piece of wood and the knife were used to get the pieces out of the sand after it had been cast, there is a small stick for poking air holds around the mould and water because it was really hot in there.
Before I could start forming the moulds in the sand I had to sieve it out first so the sand was nice and "fluffy", this was so that when the plaster was pushed in the sand had space to compact together and so that when the glass gets poured in any air can escape so there aren't any bubbles in the glass. Simon had put water in the tray of sand that morning so it needed to be mixed up and sieved out, he shoveled the majority of the contents of the tray into a bin then set up two long pieces of wood across the tray to rest the slieve on. When I had sieved out enought sand Simon used a piece of wood to flatten out the surface of the sand ready to push my plaster pieces into the sand.
When I had pushed my pieces into the sand I used a trowel and my fingers to compress the sand a little to hold the edge together and so it
s won't crumble when I use the blow torch on it. Next I wiggles the model from side to side a little so I could get it out without ruining the mould or knocking the sand out of place. When doing multiple sand casts you need to remember to have a decent amount of space between each of the moulds. When all the mould were all set out they need to be sprayed with a mixture of distilled or deionized water and graphite, one of the mould I didn't spray to see how it would look with the sandy then poked holes around the edges of the piece but not to close to help any air escape preventing bubbles in the glass.


Because the sand was wet it needed to be dried out before I could get glass poured into my moulds, to dry them off I used a blow torch to for a few minuets, for the first couple of minuets there was a lot of steam coming out of the moulds, so I kept going until there was almost no steam. Then I sieved a small amount off copper oxide into a couple of the moulds to compare to the kiln cast pieces that had copper oxide in too.
Simon then took a gather from the fur
nace on a iron with a ball at the end of it, the smaller pieces only need one gather but the larger pieces needed two. When Simon had dripped an amount of glass into the mould he held the hot end of the iron over the glass heat up the top of the glass so that it would smooth out.
The glass was left for a while to cool, then with a knife Simon cut around the glass to make a little jacket he told me it was to keep the heat in the piece and it helped with the annealing process and to minimise the contact with the glass. The piece of glass were then but on to a board and carried to a kiln for them to anneal. After the glass had been taken to the kiln I needed to mix and fluff the sand up (while wearing gloves because of the steams) and then smooth out the surface to make it easier for the next person using the sand to move around and sieve out, when I had done this I places a plastic sheet over the tray to keep the moisture in the sand. It took about 24 hours for the kiln to get to a low enough temperature for me to be able to take them out, and after I had taken them out they were still quite hot, so I was unable to clean the pieces in water but I was able to use a wire brush to dust away some of the sand that got stuck to the glass. To the right is an image of the results of my sand casting attempt, the two larger ones that look darkest are the ones I had copper oxcide in, the rest are just clear glass and the one in the middle of the smalles pieces is the piece I cast without spraying any grafite into the sand. I really enjoyed the process and was happy with the result, I plan on making some more plaster models to make a range of shapes to test with sand casting.